Ultimate Kids RV Bunkhouse Renovation: Tips, Ideas, and Inspiration
This post may contain affiliate links. Please read our disclosure policy.
Living full-time in our Keystone Montana Mountaineer with three kids has been an incredible adventure. It’s given us the freedom to get out of debt and create lasting memories. But one of our most rewarding projects was renovating the kids bunkhouse. With two little ones and a baby, we needed to create a space that was functional, safe, and fun—especially during those cold winter months. Here’s a glimpse into how we transformed their space to work perfectly for our growing family!
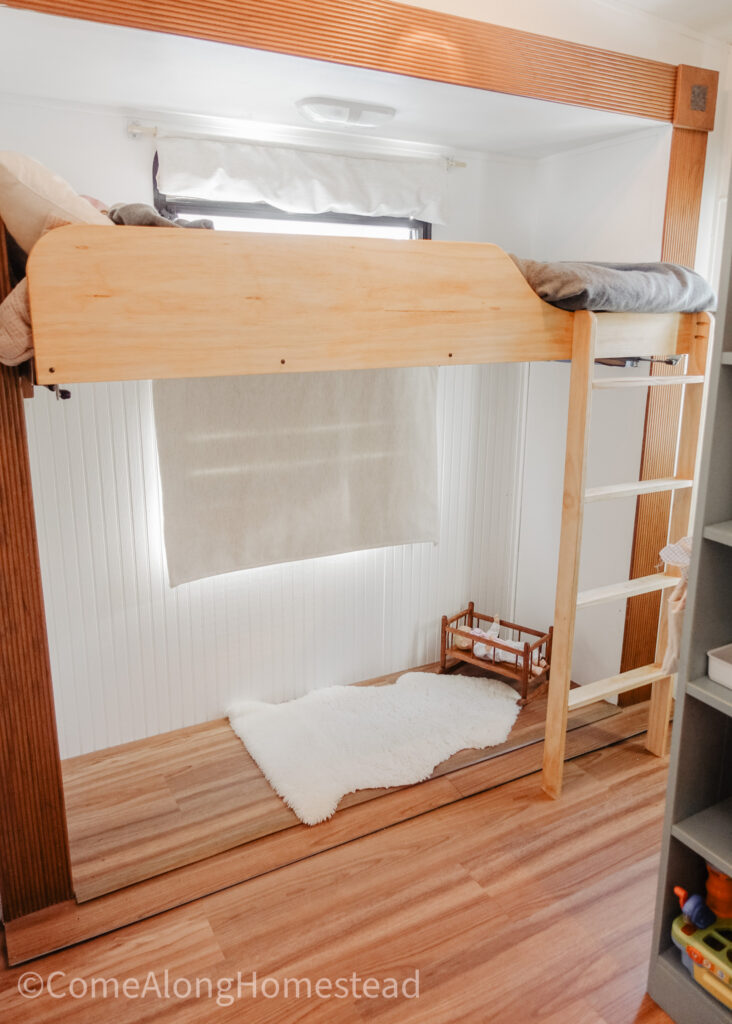
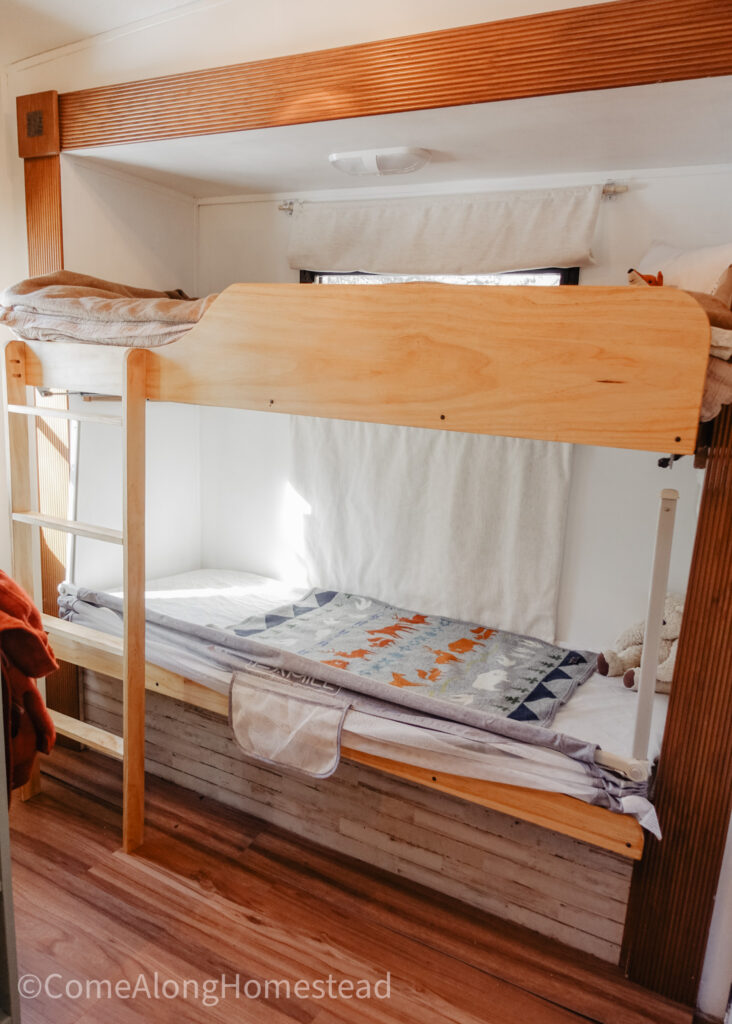
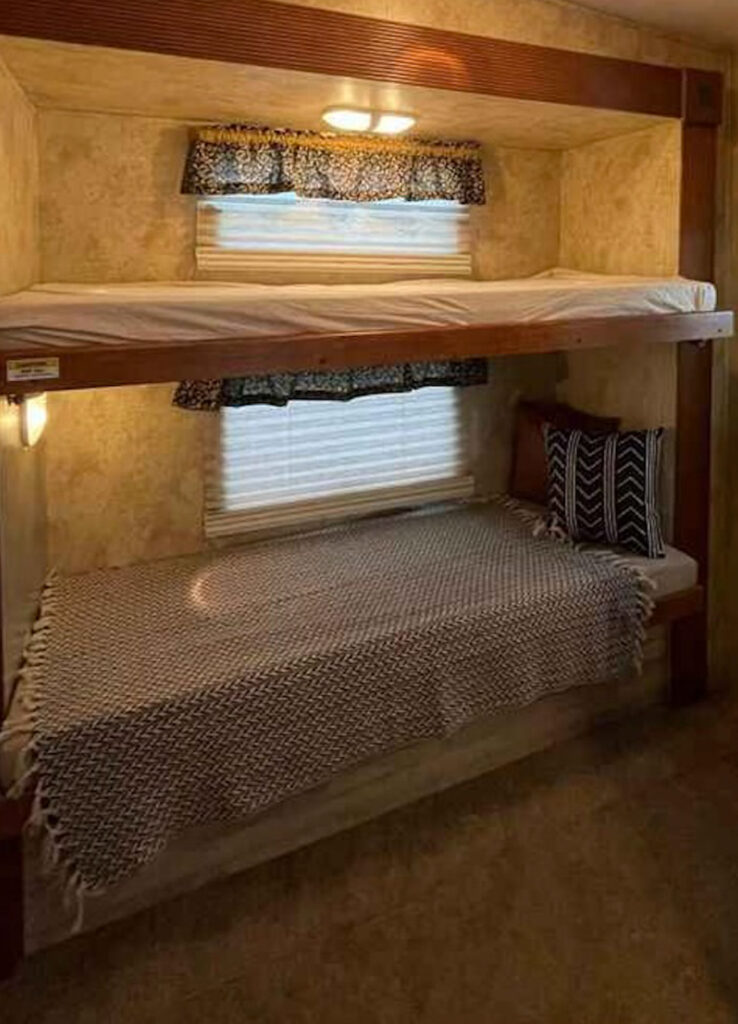
Bed Ladder and Rails: Promoting Independence and Safety
Our two older kids, ages 5 and 3, sleep in the top bunks. Before the renovation, they struggled to climb in and out and needed our help. We constantly worried about them falling, which stressed me out. So, Adam—my handy husband—built custom ladders out of pine and installed sturdy safety rails. Now, the kids climb in and out of bed on their own. It gives them a sense of independence and us peace of mind.
The renovation also became a great learning opportunity for the kids. They’ve gotten creative with how they use their bodies to get in and out of bed and we’ve noticed how much easier it is for them when their cousins, who are similar in age, come in and try climbing in and out.
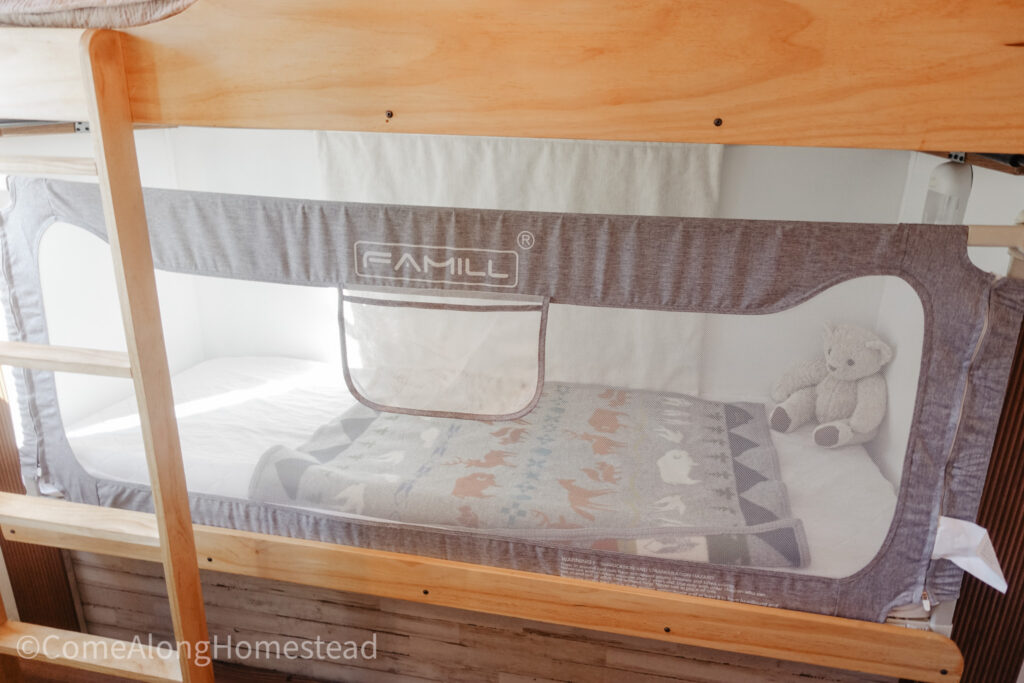
We made safety a priority during the renovation. We added rounded edges to the side railings to prevent bumps and sanded everything really well. Since Josiah, our almost one-year-old, still sleeps with us, we installed a collapsible side rail to keep him safe when he transitions to his own bunk on the bottom.
Original Bookcase Tear Out: Maximizing Space
The original TV stand and small bookcase near the bedroom entrance weren’t working. The shelves were oddly sized, so we couldn’t store regular-sized books. The layout also felt cluttered. We decided to get creative. We removed the original TV and shelving. This proved tricky because the screws were hidden in tight spots, so we had to dismantle everything carefully to avoid damaging the wall.
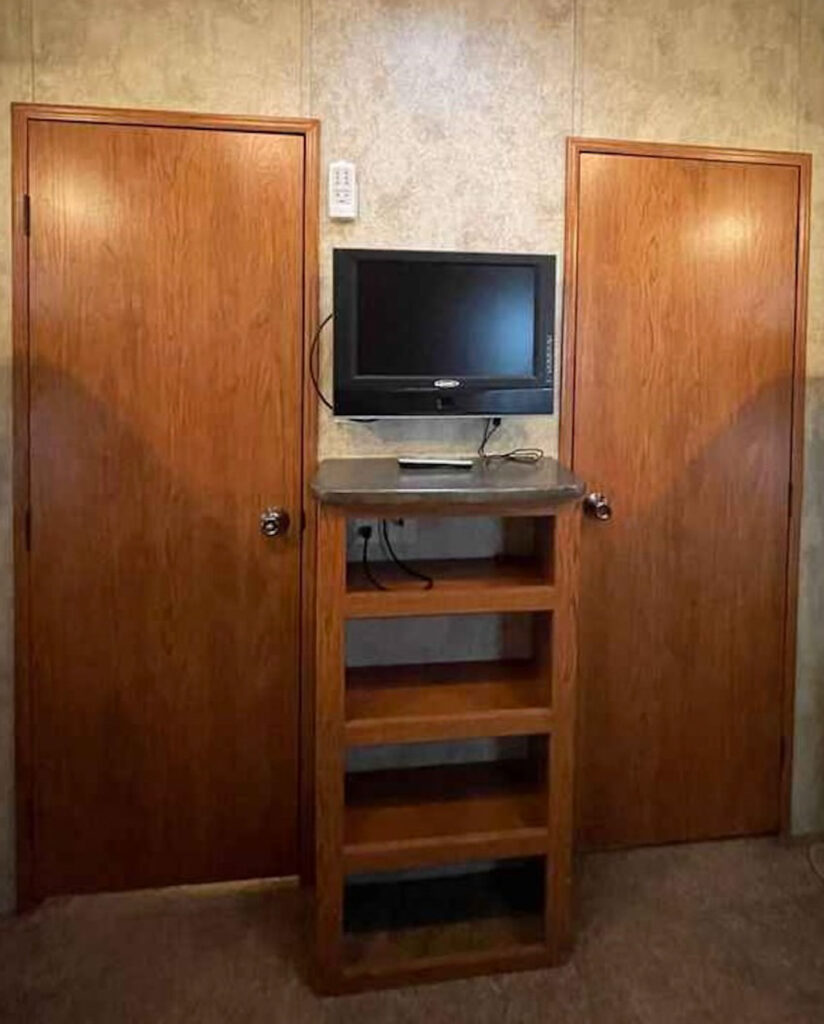
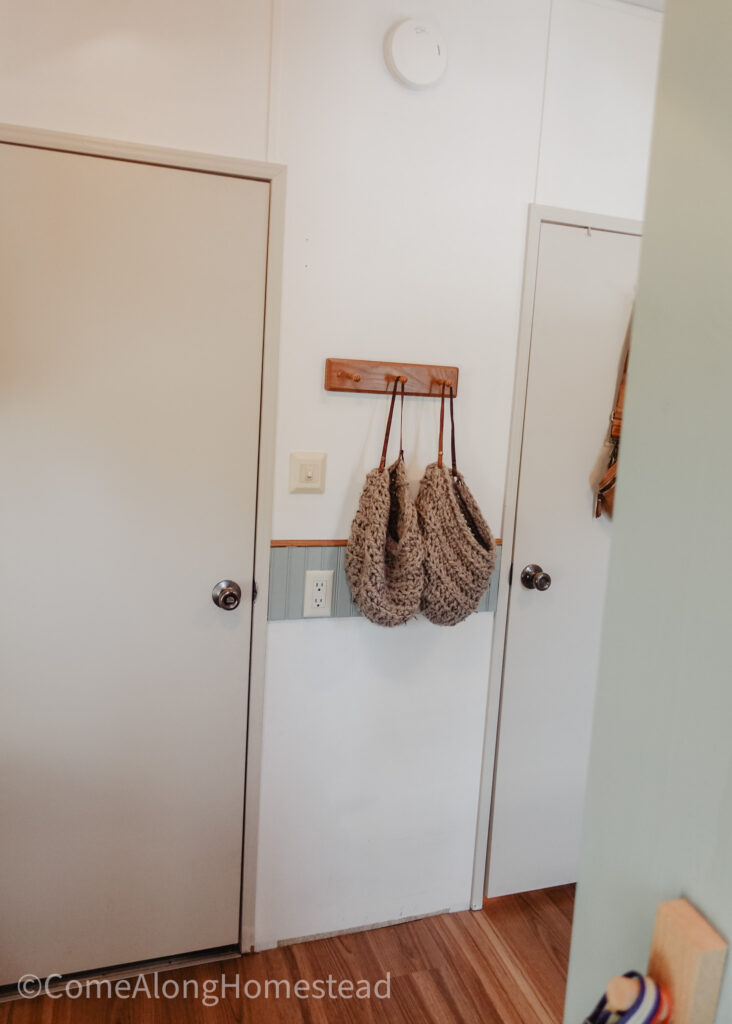
After tearing that area out, my Aunt and Uncle had the brilliant idea of covering up the holes where the TV wires used to be with some leftover bead board. We also added the pegs that were once on the side of the closet to create extra hanging space between the two doors. Huge shoutout to Aunt Debbie and Uncle Mark! They really outdid themselves, helping with the painting and building, not to mention all the creative ideas and storage solutions. We honestly couldn’t have done it without their help—and my parents’ too! It truly made all the difference having such a supportive community around us; honestly, I’d probably still be painting if it weren’t for all the amazing people who helped make this happen.
Bookcase Addition: Maximizing Storage
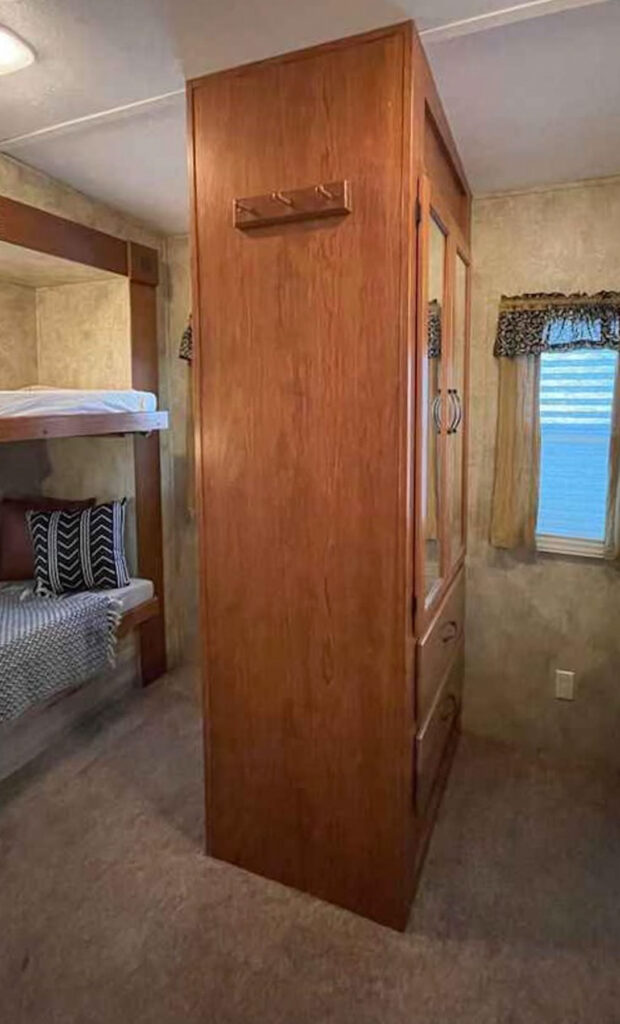
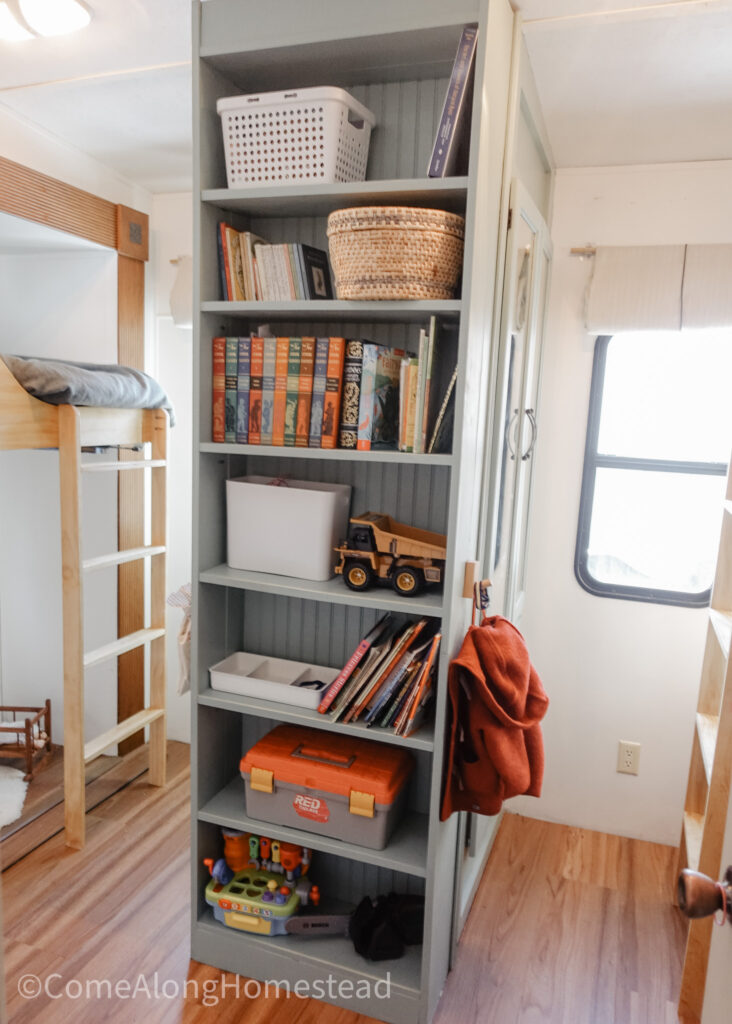
Once we cleared the space, my Uncle Mark and husband extended the closet in the center of the room, turning that extension into a floor to ceiling bookcase. I love the bead board backing to the bookcase as it gives it more dimension and creates a cozier atmosphere. This clever addition maximized the space without cramming in more furniture. Now, the kids can store their favorite books, crafts, and toys, and it helps us stay organized!
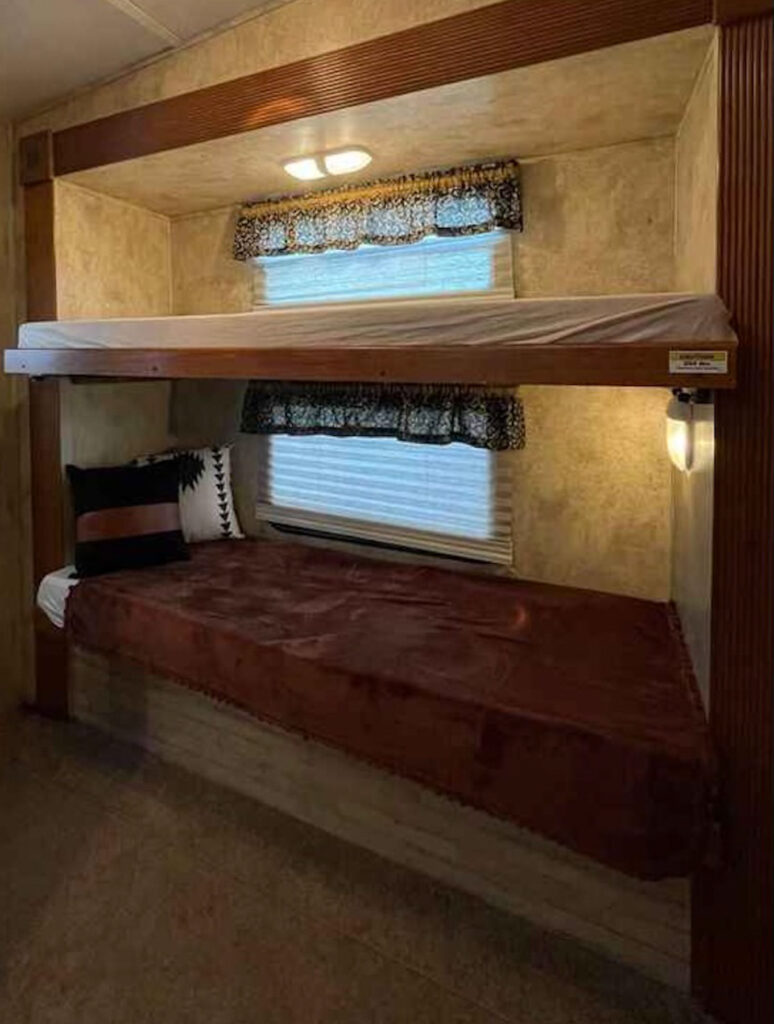
Fourth Bed Tear-Out: Creating an Open Play Area
When we first moved in, we had a fourth bunk. But with three kids, it just didn’t make sense. After thinking it over, we decided to remove the extra bed and turn that space into an open play area.
The change has been amazing! The kids now have plenty of room to spread out, play, and let their imaginations run wild. The room feels much larger and more versatile. They have a designated space for play, which has been a game-changer, especially during the colder months when they tend to want to play inside longer.
Paint: A Simple Yet Transformative Update
One of the most impactful changes we made was repainting the space. Though it was time-consuming—especially with three little ones and our long drives to and from our land—it was absolutely worth it. The new paint completely transformed the room, making it feel more like a cozy home and less like an RV. We spent months getting it just right, but every minute was worth it. If you’re moving into an RV, I highly recommend giving the walls a fresh coat of paint. It’s an inexpensive way to create a more comfortable, personalized environment.
PAINT
- Whipped Cream by Behr in Eggshell for the walls.
- Green Balsam by Behr in Satin for the wardrobe/bookshelf.
Floors: A Worthwhile Investment
We also invested in new flooring, which really made a difference in the overall look and feel of the space. As someone who’s visually sensitive to clutter and design, the old flooring just didn’t work for me. One of our slide-outs had rotted, so we had no choice but to replace the flooring in that area. This gave us the perfect opportunity to install consistent, scratch- and water-resistant floors throughout the entire RV. Not only does it look great, but it’s also durable enough to handle the wear and tear from our kids’ everyday activities. This update was extremely beneficial for us, and it ties everything together seamlessly.
Window Treatments: Cozy, Insulated, and Practical
For our window treatments, I sewed everything myself using a thermal insulated fabric, which is designed specifically for insulation. This fabric works wonders for regulating temperature inside the RV, keeping it cooler in the summer and warmer in the winter. The Warm Windows fabric is great because it helps to block drafts and keeps the space more energy-efficient, which is especially important in such a small area.
I paired it with outdoor fabric on the interior, chosen for its durability and easy maintenance. Since I knew I wanted a lighter color to brighten up the space, the outdoor fabric was perfect—it’s not only easy to clean, but it also adds a nice, fresh touch to the room. Sewing the window treatments was a labor of love, but it has been well worth it. The result? A cozy, insulated space that helps keep our kids comfortable and warm, even during the coldest winter nights.
Final Thoughts: A Room That Grows with Us
This renovation has made a world of difference for our family. The kids now have a safe, organized, and fun space in our RV. It’s been so rewarding to watch them take ownership of the room—whether it’s choosing books off the shelves or creating imaginative play scenarios. The room serves multiple purposes: sleeping, napping, and playing. All in a functional and more visually appealing area.
If you’re planning a similar renovation, remember to prioritize safety and storage. Every decision in a small space has a big impact, so think about how each feature will work long-term. We’ve learned so much through this process, and we’re excited to see how the space continues to work for our family as the kids grow.
If you’ve tackled any RV projects or have questions about small-space living, we’d love to hear from you! Leave a comment below with your ideas or questions.